Old Fashioned Strawberry Jam
Summertime In A Jar
What’s better than opening a jar of strawberry jam that you purchased from the local grocery store shelf? How about opening a jar of homemade old-fashioned strawberry jam you made yourself?
When you open up that jar of strawberry jam in December and smell the real strawberries from inside or taste that first bite of strawberry jam, it’s like opening a container filled with summertime.
Where To Get Fresh Strawberries for Strawberry Jam
If you want to start totally from scratch, you certainly could grow strawberries in your yard, and with the right-gardening method, you might be surprised just how little space you need for a sizable crop of the little red gems.
The most popular varieties are June bearing which will bear all their fruit at one time, but there are everbearing varieties also. Everbearing will produce the strawberries slower, over an extended period. This everbearing plant is a perfect variety for making small batches of jams, jellies, or preserves at a time or just eating them one by one as they grow. I like the June bearing the best myself, so I can get done and move on to the next project, but it’s just a matter of choice.
You can grow strawberries in flower pots or other containers as well as growing them in the ground. Flower pots and containers are perfect if your space is limited and you only have a patio or balcony to garden. Whether you garden on containers, raised beds, or in the open ground, using the Square Foot Gardening method for planting, you can plant four strawberry plants per square foot.
With proper care, each plant will grow between 6 and 12 inches in height, and during a good growing season, each strawberry plant should produce between 1 1/2 to 3 pounds of tender, juicy strawberries.
A better way to visualize this is each strawberry plant should yield between 1 and 2 quarts of fresh ripe whole strawberries. That amounts to between four and eight quarts of strawberries per square foot. So a 4×4 patch (16 square feet) could yield over a hundred and twenty quarts or more than a hundred and ninety pounds of strawberries. It takes about 3 pounds or 2 quarts of whole strawberries to make a batch of strawberry jam.
As a bonus, when growing strawberries, they are perennial, so with proper care and a covering of straw for wintering, you could get several seasons of strawberries from just a single planting.
If being the envy of the neighborhood for growing a beautiful strawberry patch in your yard doesn’t sound like the kind of challenge you’re up for, then purchasing fresh strawberries is probably your best option.
A Costco or a Sam’s Club are great options for big beautiful strawberries, as well as hunting them down when they are on sale at your local supermarket. If you look around when they’re in season, you’ll also find fresh, delicious strawberries at fruit stands and farmer’s markets all over the country.
U-Pick It For Some Family Fun

If you’re looking to make a few memories with the kids and the freshest strawberries around, a U-Pick Farms near you might be your best option. You’ll get to wear the kids out a little, crawling around picking fresh strawberries, and you might even get to enjoy a hayride to and from the strawberry fields.
If you’re taking the kid’s or grandkid’s strawberry picking, then keeping the kids from eating the strawberries before they hit the basket should be the only real job you have while you’re there. You’ll want to be sure to take your cell phone or a good camera with you as well because a photo of the look on a toddler’s face when they pick and eat a fresh strawberry, priceless.
Not Enough Hours In The Day
When great-grandma used to make strawberry jam, she didn’t add pectin but would spend the day crushing fruit, adding sugar, and slowly boiling it down over low heat and a lengthy amount of time. Only when it passed the gel test would she put up jar after jar up in the pantry.
What’s the gel test?
Remove the cooking strawberry jam from the heat and drip a small amount onto a plate. Place this into the freezer for just a minute or so. If the liquid on the plate gels, you can move on. If not, put the jam back on the heat and continue to cook down until it passes the gel test. You’ll want to use this test any time you make jam or jelly without added pectin.
In today’s fast-paced world, few of us have time to commit hours upon hours to cooking down fruit and then canning large batches of strawberry jam. One way to beat this time crunch is to prepare freezer jam. It’s quick to make and simple to pack into small containers and toss into the freezer. This method works well for small batches.
That’s all well and good, but I have bigger fish to fry “or store in this case,” so I don’t wish to waste my precious freezer space on strawberry jam. Also, speaking from personal experience, digging around the bottom or back of a freezer looking for a container that I haven’t seen in three months buried under a pile of hamburger packages doesn’t sound like all that much fun to me.
I’d much rather take an extra few minutes, in the beginning, to do some water-bath canning with my strawberry jam and create a shelf-stable product that will keep undisturbed even for a few years without spending a penny on refrigeration.
What You’re Going To Need
I know some of you are reading this and saying you don’t need to do a water bath when canning jams and jellies because my grandma has always just turned the filled jars upside down on the kitchen counter, and they’ve sealed just fine.
In the case of strawberry jam, there is probably enough sugar (if you’re making full sugar jam) to guard against any spoilage. That said, not all recipes call for sugar, and even if they do, you’ve gone through all the trouble of making a wholesome product for your family, heck you can even pronounce all the ingredients. Why not take the extra step for safety and do the job right. Using modern methods will help to ensure your jars seal, stay sealed, and don’t spoil for years.
What Is A Water-Bath Canner
Do I need to buy a water-bath canner? Not necessarily.
All you need is a pot large enough to hold the number of jars you wish to work with that is also deep enough to cover the jars over with a couple of inches of water.
You’re also going to need something to hold the jars off the metal bottom of the pot so that they are not in direct contact with the heat from your stove. You want a little water to get underneath the jars. However, you don’t need anything fancy to do this. When in a pinch, I’ve placed a small towel in the bottom of the pot of water, and it has worked just fine.
Using a water-bath canner will make the job much easier, so I do recommend you have one.
Mason Jars
Canning jars are a must. There are numerous brands of canning jars out there that you can choose from, but no matter which brand you choose, what you want is a rugged canning jar that will last for years and stand up to the heat and pressure of the canning process over and over again.
In North America, the most well-known of these would be Ball, Kerr, Bernardin, and Golden Harvest. There are other brands sold, but these four brands, in my opinion, are the best and most durable canning jars on the market. As for me, I’m going to spend my money on the most durable products I can find.
Lids
When you buy new mason jars, they come with two-piece lids attached to each jar. Again, there are other types you can buy, but generally, you’re going to find the two-piece to be the easiest ones to use and the most dependable when it comes to creating and holding a seal.
The two-piece lid consists of both a reusable screw-down band and a single-use flat seal. Yes, under the right conditions, you can use the flats more than once, but once they are bent, dinged, or otherwise compromised in any way, the odds of them actually creating and holding a seal drops quickly. I recommend using old flats for other purposes or put them in the recycling bin.
Jar Lifter
You’re going to need a way to lift your full jars in and out of the canner. If you own an actual water-bath canner, it came with a wire basket that holds several jars and allows you to move them in and out of that canner at one time. It also rests on the rim of the canner, holding the hot jars above the water until you are ready to work with them.
Other Helpful Tools You May Want To Consider
Other tools that aren’t vital to the process but make the job easier include:
- A de-bubbler or non-metallic stick to move air bubbles out of the jar before adding the seal
- A magnetic stick for lifting flats out of hot water
- A large Ladle for filling the jars, preferably with a lip that’s formed to help guide when pouring
- A hot pad designed for your hand and wraps around the hot jars are handy when moving them from place to place.
- A mat or pad to set the hot jars on your counter while they cool for 24 hours. (Pro Tip) Don’t set the hot jars of jam directly on your counter. They are very hot and will leave a mark.
Canning Strawberry Jam
To preserve your strawberry jam, follow the recipe provided. Always follow the guidelines provided by the National Center For Home Food Preservation.
When you remove the hot jars of jam and place them on the mat on your countertop, you’ll hear the ping of the flats as they begin to seal. (One of my favorite sounds.)
Let the jars of fresh strawberry jam sit undisturbed for 24 hours, remove the screw bands, and check the seals. If the seals are properly seated, then you won’t need the screw bands anymore. They can be washed and stored away for the next canning project.
Next, you’ll want to wash the jars of strawberry jam with a dishcloth and warm soapy water to remove any deposits. Then, use a marker on the flats or a label describing what’s inside. Trust me, you may know what’s there now, but six months from now, not so much. Be sure your label includes the month and year you made the jam as well.
How Do I Store My Homemade Old-Fashioned Strawberry Jam
Once your jars of strawberry jam have cooled completely, it’s time to store them away until you’re ready to open a jar. We’ve all seen people store jars of canned food stacked on top of each other, with the canning rings screwed down on the jars.
There’s A Better Way To Store Homemade Strawberry Jam
One advantage of the two-part lid is that if the flat does not seal, the center will move up and down when pushed. The same applies to six months later. If you go to use a jar, you want to check the seal before opening the jar. If you discover the flat is no longer sealed, then what has likely happened is a gas created by the spoiling food inside the jar has pushed up on the sealed flat from the inside and broken the seal. Throw the food out and wash the canning jar for next time.
If you store your food with the screw band on the jar, then don’t screw the band down tight. Leave it loose enough to wiggle around with your fingers so the flat can pop off if something spoils.
Also, don’t store jars of strawberry jam or any other canned food stacked on top of each other. Put them on the shelf in a single layer, so that the flat is free to pop off if there is an issue.
Delicious Old Fashioned Strawberry Jam
Using pectin will thicken and set your strawberry jam, reducing your cooking time dramatically while helping to preserve that fresh summertime flavor.
Small batch canning is the perfect solution for the busy, modern-day home.
Full-sugar, low sugar, powder, or liquid is your choice. We created this recipe using a full-sugar powdered pectin.
Be sure to watch our recipes for other versions.
Makes about eight -8 oz jars of strawberry jam

Ingredients
Instructions
Wash
Wash jars, lids, rings, and all canning equipment with hot soapy water.
Set your canning rings aside and place flat lids in a small saucepan of cool water. Turn the heat on low. You don't want this pan to boil, you just want to soften the sealing material a bit.
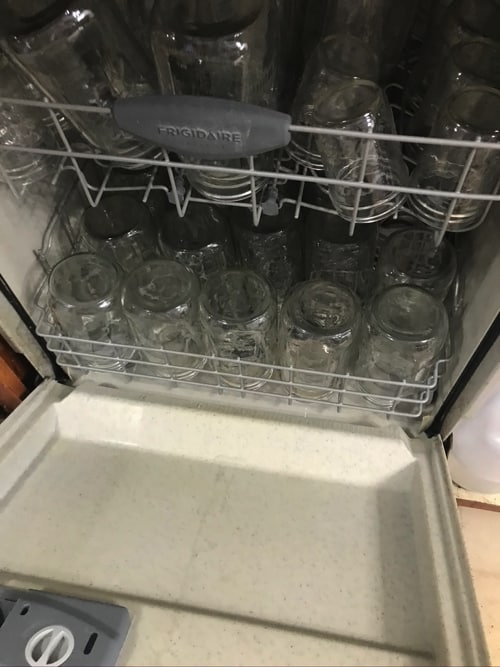
Sterilize your clean jars in the dishwasher. You can also place them into the water-bath canner or a large stockpot cover jars with at least 2 or 3 inches of cool water. Cover and bring to a simmer over medium heat for at least 10 minutes
"Time Saver Alert" Add a tablespoon or so of vinegar to the water. This will prevent that white mineral buildup on the inside of the canner and on the outside surface of your canning jars making the cleanup process much easier.
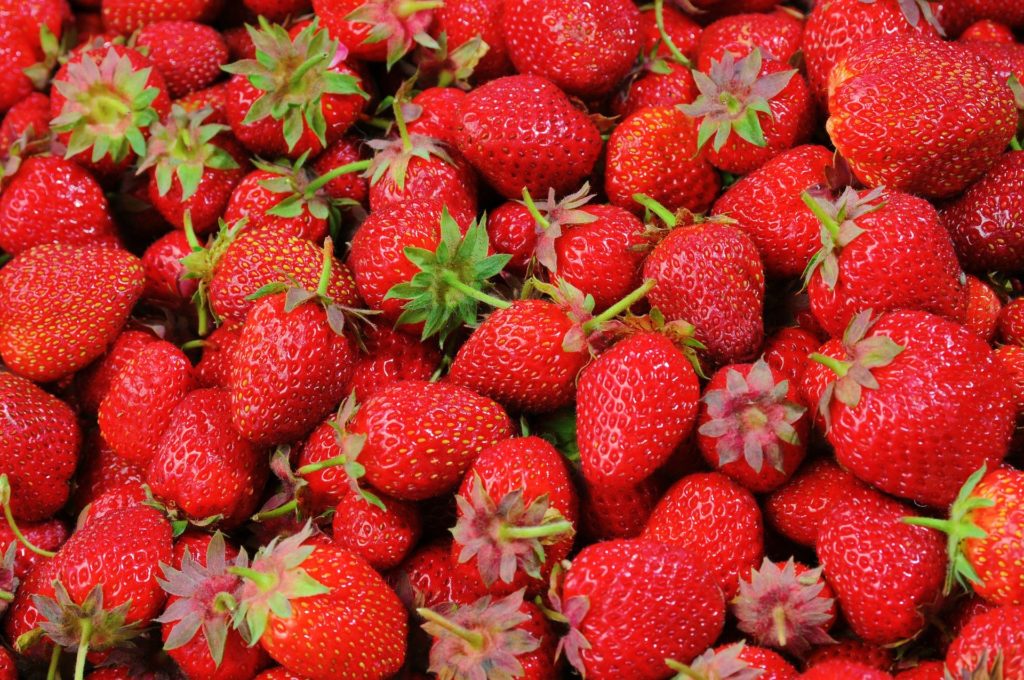
Wash strawberries and remove the hulls
Measure
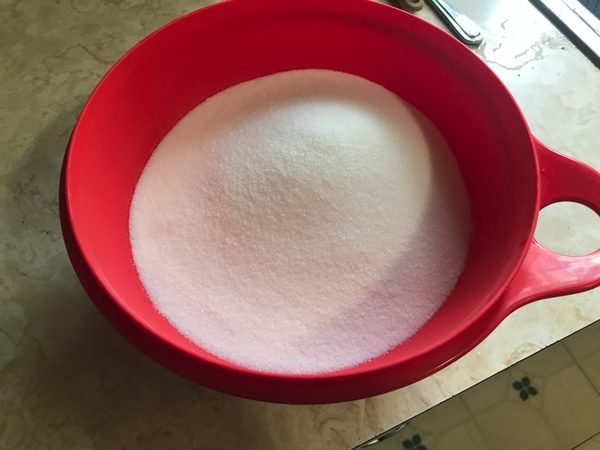
Measure the sugar into a bowl in advance. Because when making jams and jellies this way, it's important to add the sugar to the jam all at once.
Using a flat bottom bowl and a potato masher, crush the strawberries one layer at a time. Repeat this process until you have five cups of crushed berries.
Boil
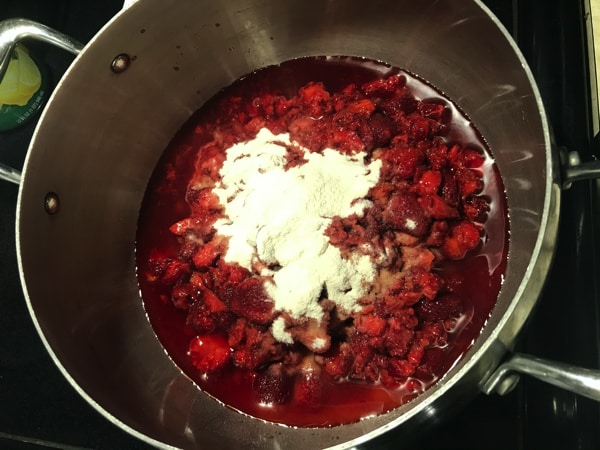
Place the crushed strawberries along with the lemon juice and dry pectin into a stainless steel or enameled heavy bottom saucepan large enough to handle the mixture along with the sugar you'll be adding later.
Over high heat and stirring frequently, bring the whole mixture to a full rolling boil.
Once you've reached a full rolling boil, add the sugar to the mixture all at once.
Stirring constantly, return to a full rolling boil that cannot be stirred down. Boil hard for 1 full minute.
Remove from heat and use a skimmer or slotted spoon to remove any foam from the top of the mixture.
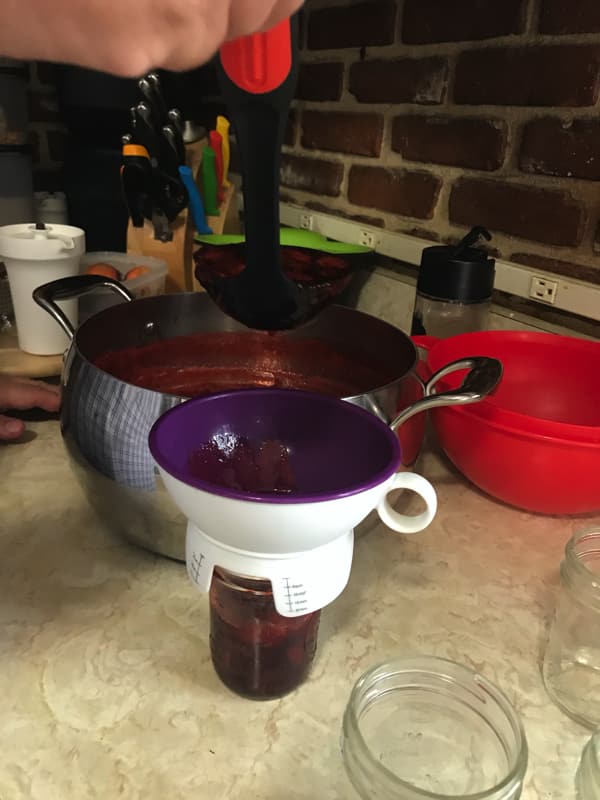
Fill
Remove your jars from the canner and fill each jar leaving 1/4-inch headspace.
Slide a non-metallic utensil around between the jam and the wall of the jar to remove any air bubbles. Adjust headspace if needed.
"Time Saver Alert" Using a canning funnel, ladle, de-bubbling stick will help greatly in this process.
Wet a towel with vinegar or water and wipe down the rim of each jar. You want to make certain the rim of the jar is free of anything that might prevent the jar from creating a proper seal.
Using a magnetic stick or or other utensil remove a lid from the pan of warm water and center onto your jar. Place a screw band on jar and tighten the screw band to finger tight plus a quarter of a turn. (do not over-tighten)
Process
Once jars are closed place them into the canner making sure the water level is at least a couple inches above all the jars. Cover the canner and bring to a full rolling boil and process for 10 full minutes. Adjust the time accordingly for your altitude.

Cool
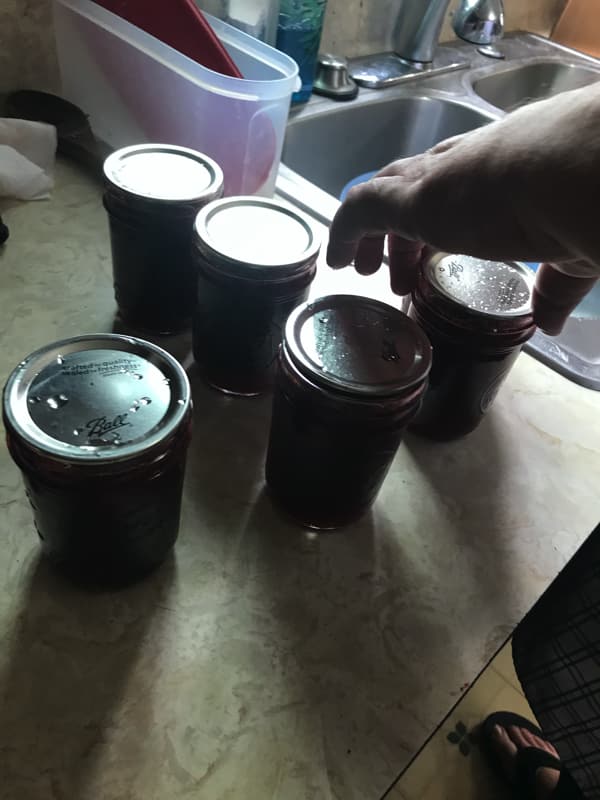
Once the time is up remove the canner from heat and the lid from your canner. Let everything rest for five additional minutes before removing the jars of jam.
In an out of the way place, lay a dry towel out on your countertop to protect your countertop from the heat. Using a jar lifter place hot jars of strawberry jam upright onto the dry towel and leave them undisturbed for twenty-four hours.
Once the jam is completely cool make sure each jar has sealed by testing the indicator on the center of the lid. Any jars that did not seal should be placed in the refrigerator for use.
Remove the screw bands and wipe down each sealed jar and label them right away. If you don't, six months down the line you're going to be looking and wondering whats in that jar. Be sure to include the month and year in your label so you can rotate your stock.
Nutrition Facts
Servings 64
- Amount Per Serving
- Calories 109kcal
- % Daily Value *
- Total Fat 1g2%
- Saturated Fat 1g5%
- Sodium 2mg1%
- Potassium 29mg1%
- Total Carbohydrate 28g10%
- Dietary Fiber 1g4%
- Sugars 27g
- Protein 1g2%
- Vitamin A 2 IU
- Vitamin C 11 mg
- Calcium 3 mg
- Iron 1 mg
* Percent Daily Values are based on a 2,000 calorie diet. Your daily value may be higher or lower depending on your calorie needs.